REVIEW · BUDAPEST
Budapest Photo Walks
Book on Viator →Operated by Budapest Photo Walks · Bookable on Viator
Budapest looks different through a lens. This customizable photo walk helps you turn iconic spots into actual photos, with a day or nighttime route plus practical tips for framing. I love that it’s flexible—your stops can change with your interests and the weather—and I also like that a tripod is included, so you’re not scrambling to improvise. One thing to consider: you’ll be doing a fair bit of walking on hills, and the exact timing depends on conditions.
I also like the small-group vibe, because it stays personal instead of rushing past views. The guide I’m seeing credited again and again is Zoltan, and the feedback points to patient, clear photography help paired with smart pointers for where to shoot at night. If you’re expecting a ride-and-stare tour, this isn’t that kind of experience.
In This Review
- Key Things You’ll Love About This Budapest Photo Walk
- A Small-Group Photo Walk Built for Getting Better Fast
- Price and What You’re Really Paying For
- Meeting at Batthyány tér: Simple Start, Flexible Finish
- The Core Experience: Composition Coaching on a Real Shooting Route
- Itinerary Walkthrough: Gellért Hill and the Day-to-Night Photo Switch
- Stop 1: Gellért Hill (Day and Night)
- Extra time and place changes
- Castell de Buda at Night: Chain Bridge View With a More Dramatic Mood
- Stop 2: Castell de Buda (Night Tour Only)
- Liberty Bridge: The Handy Connector for Framing Gellért Hill
- Stop 3: Liberty Bridge (Day and Night)
- Batthyány Square: Parliament Views That Actually Translate Into Photos
- Stop 4: Batthyány Square (Day and Night)
- What Zoltán’s Style Likely Means for Your Photos
- Who This Tour Fits Best (and Who Might Skip It)
- Day vs. Night: Picking the Right Time for Your Photos
- Day tour strengths
- Night tour strengths
- Practical Tips Before You Go (So You Get Better Results)
- How to Make the Most of 2 to 3 Hours
- Should You Book Budapest Photo Walks?
- FAQ
- How long is the Budapest Photo Walk?
- Where does the tour start?
- What’s included in the price?
- Is the tour offered in English?
- Is there a choice between day and nighttime?
- Can I cancel for a full refund?
Key Things You’ll Love About This Budapest Photo Walk
- Day or night options let you match your photos to the light you want
- Tripod included makes long exposures and steadier shots easier
- A small group cap (2 travelers) keeps coaching focused on your camera and questions
- 4–5 main viewpoints from Gellert Hill depending on your fitness and interests
- Trip route adjusts based on weather and what you request
- Off-the-beaten-track angles help you avoid the same postcard view
A Small-Group Photo Walk Built for Getting Better Fast
At $179.74 per person for roughly 2 to 3 hours, this is the kind of tour that only makes sense if you care about results. If you just want to collect sightseeing stamps, you’ll get more out of wandering on your own. But if you want better photos—without guessing—this format is a solid value.
The biggest win is that you’re not stuck on a rigid checklist. You can choose daytime or nighttime, and your guide can shift the route to match your goals and the weather. That matters in Budapest, where clouds, wind, and winter light can change everything for night shooting and even for daytime contrast.
Also, the group size is tiny—maximum of 2 travelers. That’s rare in city tours. It means you can ask about settings, composition, or how to stabilize a shot, and you won’t be competing with a large crowd for attention.
You can also read our reviews of more tours and experiences in Budapest.


Price and What You’re Really Paying For
Let’s talk money in a grounded way. The price isn’t low, but it isn’t meant to replace a guide for the whole day either. You’re paying for three practical things:
- Focused instruction on composition and camera settings if you need it
- Access to better shooting spots, including viewpoints that are less crowded
- Gear support, since a tripod is included
If you already know your camera well and you’re only chasing quick snapshots, the tour might feel like overkill. But if you’re traveling with a phone, a compact camera, or a camera you don’t fully trust at night, the tuition-like guidance is exactly what you’re paying for.
And because the itinerary can flex, you’re not wasting time at spots that aren’t working in the moment. The route depends on weather and your fitness. That reduces the usual problem of photo tours: showing up, taking one shot, then waiting around.
Meeting at Batthyány tér: Simple Start, Flexible Finish

You start at Batthyány tér (HBudapest 1011) in front of the metro M2 station. The instructions also note that the exact end point is agreed with you at the beginning, so you’re not locked into a long march back across town.
This is a smart setup. The meeting point is transit-friendly, which helps on arrival day. It also means you can time your walk around your own schedule without needing private transport.
The tour runs Thursday through Sunday, with opening hours listed in the provider details. Confirmation comes at booking time, and you’ll get what you need so you can show up without guesswork.
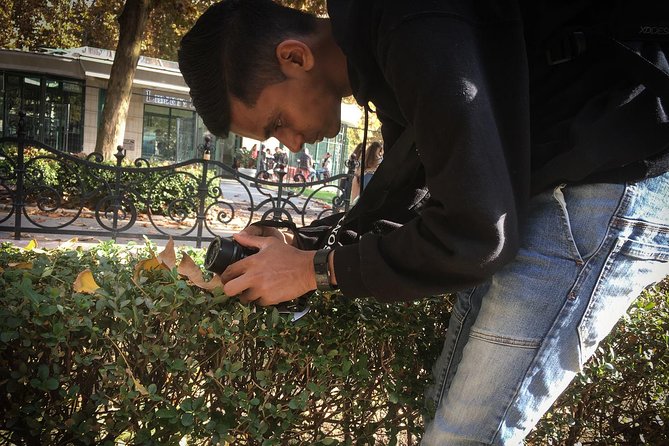
The Core Experience: Composition Coaching on a Real Shooting Route
This photo walk is built around a simple idea: you’ll learn by doing. The guide can cover composition and camera settings if needed, so beginners aren’t left with a camera and a prayer.
In a city like Budapest, you can easily end up taking the same flat skyline shot everyone takes. Coaching helps you make choices: where to place the horizon, how to use leading lines from bridges and railings, and how to avoid the tourist crowd getting in your frame.
The tripod included also changes what’s possible. Even if you’re not chasing fireworks or star trails, steadier shots improve sharpness at night. That’s the difference between a nice idea and an image you actually want to keep.
Itinerary Walkthrough: Gellért Hill and the Day-to-Night Photo Switch


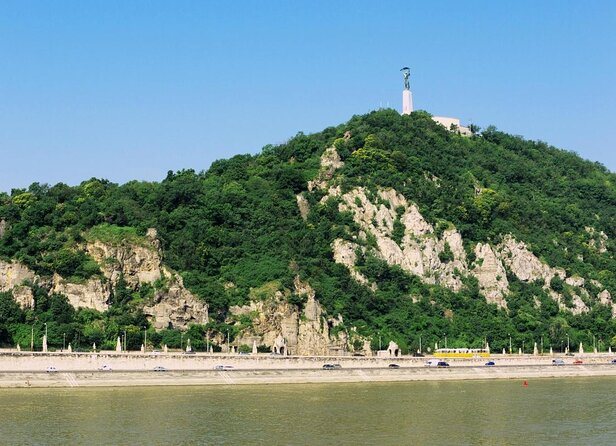
Stop 1: Gellért Hill (Day and Night)
Gellért Hill is the anchor. The route centers on it for both day and nighttime tours, and the plan allows for 4 to 5 main view points depending on your personal needs and fitness. Expect roughly 15 minutes allocated here, but the important part is that the guide can trade time between viewpoints based on what you want and what the light is doing.
Why this stop works:
- It’s one of the best places to photograph the city’s layout and river drama.
- You can use different angles to get variety without traveling far.
- For night shooting, the hill can give you more controlled framing and depth.
What to watch for:
- This area can feel steep. If you’re not comfortable with hill walking, tell the guide early so the route can adjust.
- Weather can shift visibility and color. That’s normal, but it affects how many viewpoints are comfortable to do.
Extra time and place changes
The tour is explicitly described as customizable. If you want more time at one angle or a slightly different scene, you can agree on it during the walk. I like that the plan treats the itinerary as a working draft, not a law.
Castell de Buda at Night: Chain Bridge View With a More Dramatic Mood

Stop 2: Castell de Buda (Night Tour Only)
Castell de Buda shows up for the night itinerary only, with the plan noting a roundabout and a Chain bridge view. This stop is designed for atmosphere: you’re aiming for the kind of city photo where lights and reflections help do the heavy lifting.
Why it’s worth going at night:
- Bridges and buildings look more dimensional under lights.
- Night scenes often give you more creative options for exposure and contrast.
- It feels like a different Budapest than the daytime postcard view.
Drawback to consider:
- Night photography is more gear- and stability-sensitive. That’s exactly where the included tripod helps.
- If it’s very windy or wet, shooting conditions can be less comfortable. The guide can still adjust how long you stay and what angle makes sense.
Liberty Bridge: The Handy Connector for Framing Gellért Hill
Stop 3: Liberty Bridge (Day and Night)
Liberty Bridge (Szabadság hid) is listed with a view of the bridge and Gellért Hill, and it’s included in both day and night routes. The allotted time is around 20 minutes, but again, the real value is how the guide uses that short window to help you frame a cohesive shot.
What you’ll likely focus on here:
- Using the bridge as a foreground element
- Getting Gellért Hill in the same frame for context
- Trying different compositions—centered symmetry versus off-center tension
Daytime tip: daylight can make the scene clearer, but it can also flatten contrast. If the sky is bright, ask for advice on how to balance highlights so buildings don’t look washed out.
Nighttime tip: you can take advantage of steady tripod placement to keep lines crisp. The goal is to avoid turning light sources into overly big blobs.
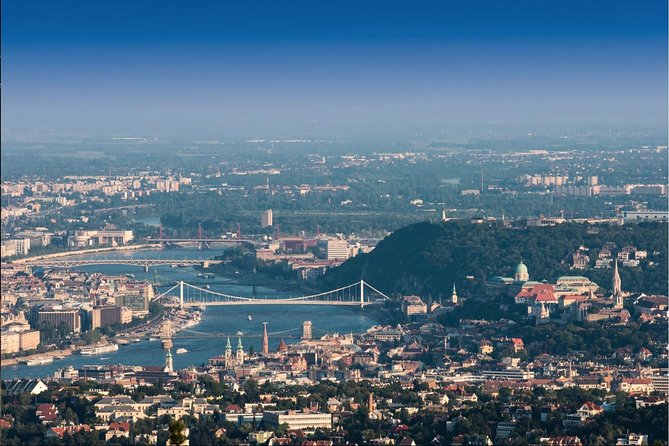
Batthyány Square: Parliament Views That Actually Translate Into Photos
Stop 4: Batthyány Square (Day and Night)
Batthyány Square is a classic stop for a reason: you get a classic view of the Parliament. The plan suggests about 15 minutes here, and it works in both light conditions.
Why it’s a good photo endpoint:
- It’s instantly recognizable, so you know you’re getting a high-impact photo.
- It’s a natural place to practice framing choices you’ve practiced earlier—foreground, horizon placement, and balance.
The practical downside:
- Because this is a well-known view, you may need to work a little harder to find your cleanest angle. The tour’s pitch includes off-the-beaten-track vantage points, but this specific spot is still widely seen. The guide’s job is to help you make it work anyway.
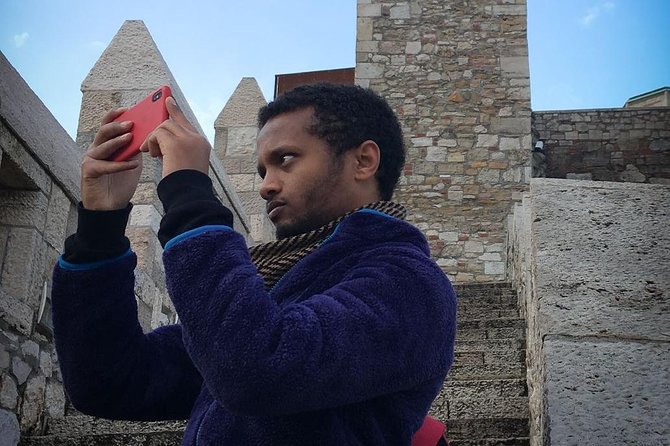
What Zoltán’s Style Likely Means for Your Photos
The guide named in the strongest feedback is Zoltan. The comments emphasize two things: he’s patient about explaining photography in a way that’s easy to follow, and he knows solid spots for night pictures.
That pairing matters. Many photo tours focus on where to stand, but the results improve when someone also helps you understand why the shot looks good. Even simple tweaks—like changing your angle a few steps, adjusting framing, or thinking about exposure for night—can upgrade your photos fast.
And since the itinerary depends on what you want and what the weather allows, a guide who can adapt matters. If a viewpoint isn’t working, he can shift you to another angle rather than forcing the same shot every time.
Who This Tour Fits Best (and Who Might Skip It)
This experience is a great match if you:
- Want to improve composition and basic camera settings without taking a full photography class
- Like structured guidance but still want flexibility in your route
- Prefer small group attention and real coaching
- Plan to shoot in both daytime and nighttime lighting
You might consider skipping if you:
- Only need a couple quick souvenir photos and don’t care about technical improvement
- Have mobility limits and aren’t comfortable with hill walking (the itinerary adjusts, but Gellért Hill is central)
- Expect private car transport (private transportation is not included)
A helpful note from the tour info: most people can participate, and the route can vary depending on fitness. That means you should tell your guide what you can handle at the start.
Day vs. Night: Picking the Right Time for Your Photos
Choosing between day or nighttime isn’t just about what time you go. It’s about what kind of photography you want to practice.
Day tour strengths
Daylight can help you:
- See and compose quickly
- Keep your camera settings simple
- Focus on framing and story rather than stabilization
You’ll still visit major viewing areas like Gellért Hill, Liberty Bridge, and Batthyány Square.
Night tour strengths
Night is where the tripod and coaching start paying off:
- City lights add contrast
- Bridges and rooftops become layers
- The tour includes Castell de Buda with a Chain bridge view
Expect the route to keep adapting to weather and what’s safely shootable.
Practical Tips Before You Go (So You Get Better Results)
Here’s how to set yourself up for a smoother photo walk:
- Bring a camera and the mode you actually use. If you’re unsure, tell the guide; they can work with what you brought.
- Wear shoes you’d wear for hills. Gellért Hill is part of the plan for both day and night.
- If you’re serious about night photos, dress for conditions. Cold wind can make your fingers forget settings fast.
- Ask for help at the start. Since coaching is built in, you’ll save time by telling the guide what you want to learn.
Also, the tour includes a tripod. That’s great—just plan for carrying it while you walk between viewpoints.
How to Make the Most of 2 to 3 Hours
A common issue with short tours is that people waste time. Don’t. Here’s the best approach:
- Decide your goal: skyline, bridges, Parliament, or lights-and-reflections.
- Pick one or two composition ideas you want to try, like foreground framing on Liberty Bridge.
- Take a first photo early as a baseline. Then refine as the guide gives you tips.
- Use the flexibility. If your favorite view is working, ask to spend a bit more time there.
Because the tour can cover 4–5 main view points from Gellért Hill (and can add or trade time), you can leave with a set of photos that actually match your taste, not just whatever angle happens to be nearby.
Should You Book Budapest Photo Walks?
I’d book this if you want photos that look intentional, not accidental. The small group cap, the included tripod, and the fact that the route is flexible with weather and your fitness make it feel like a personalized photo session wrapped in a smart city walk.
If you’re a beginner, it’s especially appealing because the guide can explain composition and camera settings in a way that fits real life. If you’re more advanced, the day/night options and the targeted viewpoints can still help you find better angles and refine your approach.
If your top priority is purely sightseeing with minimal effort, you may prefer a standard walking tour and photograph on your own time. But if you want to go home with images you’re proud to share, this is a strong bet for Budapest.
FAQ
How long is the Budapest Photo Walk?
It runs about 2 to 3 hours, depending on your requests, your fitness, and the weather.
Where does the tour start?
The start point is Batthyány tér (in front of the metro M2 station). The meeting location is set, and the exact end point is agreed with you at the start.
What’s included in the price?
A tripod is included.
Is the tour offered in English?
Yes, the experience is offered in English.
Is there a choice between day and nighttime?
Yes. You can choose between day or nighttime itineraries, with flexible dates and times.
Can I cancel for a full refund?
Yes, you can cancel for a full refund up to 24 hours in advance of the experience’s start time.