Budapest turns different when you shoot on analog. This Analog Photo Trip mixes iconic buildings with hands-on camera time led by Emese Tárnok. I especially like the way you start at major landmarks and still get time for slower looking, and I like that you get analog cameras made easy before you lift the lens. One consideration: this experience needs good weather, and the stops are short, so you’ll want to keep moving at a photo pace.
You meet in central Pest and finish at Fisherman’s Bastion, all in about 3 hours 30 minutes. It runs in English, uses a mobile ticket, and caps at 12 travelers, which helps the guide keep the group together. If you’re expecting a long sit-down tour, plan for a walking-and-shooting rhythm instead.
In This Review
- Key things I’d note before you book
- Analog cameras, real Budapest views
- Starting point near CBI CompareBudapest to kick things off
- Stop 1: St. Stephen’s Basilica and the big-church orientation
- Stop 2: Szechenyi Lanchid and the Chain Bridge photo moment
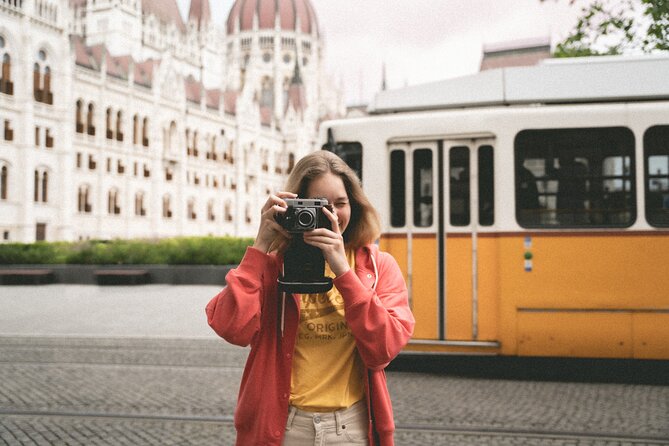
- Stop 3: Hungarian Parliament Building at Kossuth Lajos square
- Stop 4: Margaret Bridge for a changing perspective
- Stop 5: Matthias Church in just 5 minutes
- Stop 6: Fisherman’s Bastion and the Castle District finish
- Price and what you’re really paying for
- Who this tour suits best
- The pacing: walking loop, short photo windows, and time to ask questions
- Weather and why it matters more than you think
- Should you book the Analog Photo Trip?
- FAQ
- FAQ
- How long is the Analog Photo Trip in Budapest?
- Where does the tour start and end?
- What time does the tour begin?
- What language is the tour offered in?
- How many people are in the group?
- Do I need separate admission tickets for the stops?
- Do I get instructions for using the analog camera?
- Is mobile ticketing used?
- What if the weather is bad?
- Is free cancellation available?
Key things I’d note before you book
- Small group size (up to 12) keeps your questions from getting lost
- Analog camera instruction means you’re not guessing your way through settings
- Golden-hour style timing (5:00 pm start) fits the skyline views and river bridges
- A stop-by-stop highlight loop covers basilica, Parliament area, bridges, castle views
- Free admission tickets listed for each stop helps you control your budget
- Printed photos as a souvenir adds a tangible keepsake beyond phone shots
Analog cameras, real Budapest views
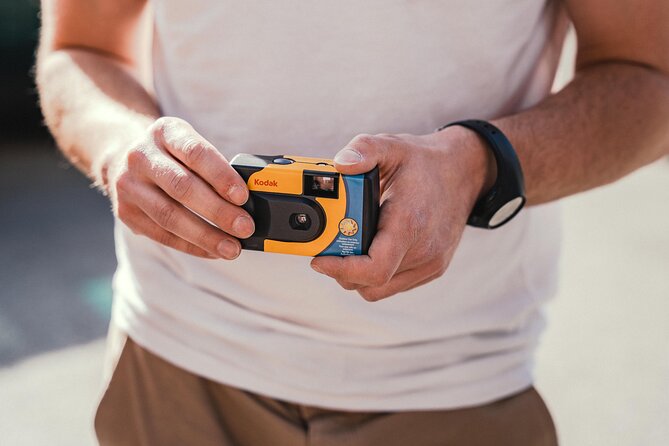
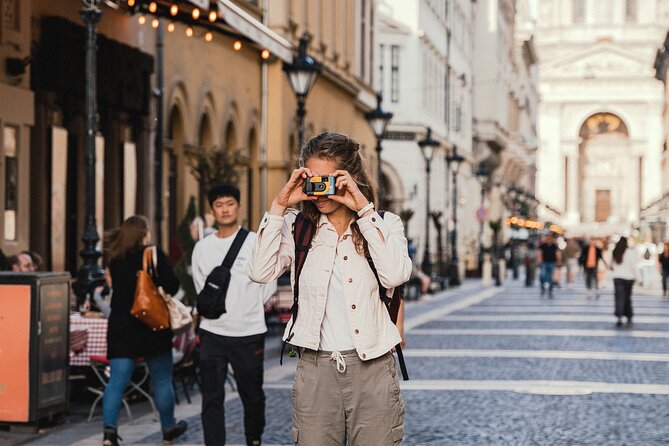
This tour is built for people who want more than another highlight checklist. You’re going to walk Budapest at a human speed, but the main twist is that you’re photographing with analog cameras. That changes how you notice things. You slow down naturally. You think before you press the button. And you end up with physical photos you can actually hold and remember.
I like that the trip doesn’t assume you already know how to use the camera. You get a brief instruction about the analog cameras, then you’re guided toward the best moments to frame a shot. In a city with nonstop photo temptations, that structure matters. You’re not wandering while the group moves on without you.
Another thing I value: the route ties big sights to practical viewpoints. You don’t just pass by places like St. Stephen’s Basilica and the Hungarian Parliament Building. You stop, look around, and learn why these spots matter, then you move on with a photo plan.
The downside is simple: the itinerary is tight, and several stops are around 5 to 15 minutes. If you’re the type who needs lots of time for wandering and reading plaques, you’ll want to accept that this is a guided loop with short photo windows. The tradeoff is that you cover a lot without turning it into an all-day grind.
You can also read our reviews of more tours and experiences in Budapest.


Starting point near CBI CompareBudapest to kick things off
The meeting point is CBI CompareBudapest, Anker köz 2-4, 1061. The start time is 5:00 pm, and the tour ends at Fisherman’s Bastion, 1014. That end point is handy: once you’re done photographing, you’re already in the Castle District area where you can keep exploring on your own.
Because you’re starting in a central area and the tour is near public transportation, it’s easier to slot into an evening plan. You’re not locked into a complicated schedule before the meeting. Also, the experience is offered in English, so you’ll get the same type of explanations at each stop without language gaps.
The group cap of 12 travelers is meaningful on an analog tour. It helps the guide give clear camera guidance and keep the flow from breaking every time someone needs help. It’s also a nice size if you’re traveling with a partner or a small group and still want the energy of other people around you.
Stop 1: St. Stephen’s Basilica and the big-church orientation
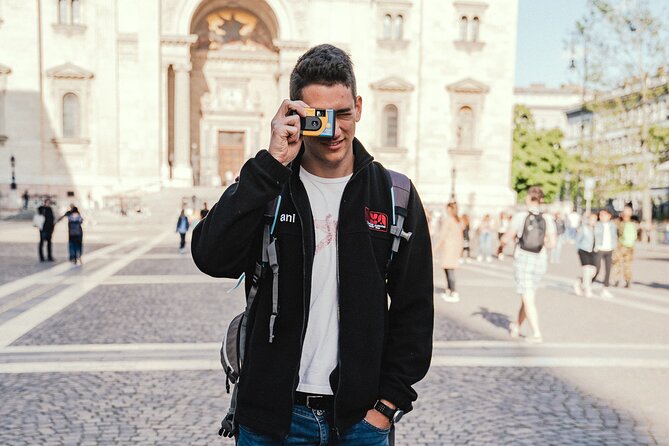
Your first stop is St. Stephen’s Basilica (Szent Istvan Bazilika). You’ll spend about 15 minutes looking around and learning about the history of Hungary’s nicest and most important church, at least as framed by your guide. Even in that short window, this is a good way to anchor the trip. It sets a cultural tone before the route turns toward river views and Parliament Square.
For analog photography, a basilica is also a smart starting point because of the strong shapes and clear architectural lines. Even if you’re new to the camera, you can practice framing without needing a complicated setup. You get a chance to settle in, ask questions early, and avoid the panic of realizing you missed your first good shot.
One practical tip: since your time here is limited, don’t try to photograph everything. Pick a couple of angles you like and use the stop to confirm your camera focus and exposure approach before moving on.
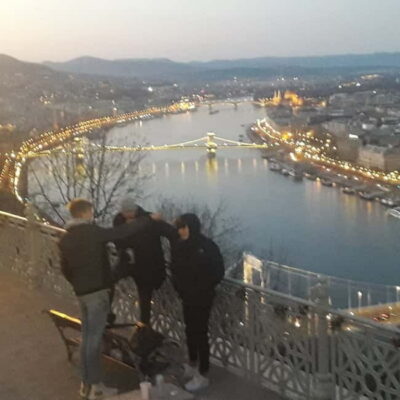
Stop 2: Szechenyi Lanchid and the Chain Bridge photo moment
Next up is Szechenyi Lanchid, where you capture the view of the Chain Bridge with Buda Castle in the background. You’ll have about 15 minutes, and before you hop on Tram 2, this is one of those moments where you get an actual “stand still and frame it” payoff.
This stop works well for first-time analog shooters because it’s straightforward: you have a defined bridge view and a layered background. You’re not chasing a tiny detail. You can hold the camera steady, work with composition, and let the scene do the heavy lifting.
The guide’s timing matters here too. You’re not just stopping randomly; you’re stopping before heading on Tram 2, so you get your view capture without needing to fight the logistics on your own.
If you’re the sort of photographer who likes to try a few variations, use this stop to experiment: one wide framing, one tighter angle, and maybe a shot from a slightly different position. With analog, you’ll feel better knowing you tried a range instead of relying on one single exposure.
Stop 3: Hungarian Parliament Building at Kossuth Lajos square
Then you move to the Hungarian Parliament Building, spending around 15 minutes looking at the surroundings of Kossuth Lajos square. The focus here is not just the building in front of you, but the space around it, plus the history of this place as you learn it on the walk.
Photography-wise, this stop can be more challenging than the bridges because Parliament-area scenes often include more visual clutter: people, signage, and wider streetscapes that tempt you to include too much. For analog, that temptation is exactly what you want to manage. Instead of trying to capture every element, aim for recognizable geometry: the facade, the square edges, and the framing that keeps the scene readable.
I also like that this stop is explained. If you have context, you can pick what to emphasize in your photos. Even when your camera skills are new, your eye gets sharpened by what the guide points out.


Stop 4: Margaret Bridge for a changing perspective
After Parliament, you head to Margaret Bridge, where you get a unique view of the places you came from and the places you have ahead. This stop lasts about 15 minutes, and it’s more than a scenic break. It’s a visual link. You get to see the route you already covered and the next portion of the day—basically a live map made out of architecture and water.
For analog shooters, this is a sweet spot. Bridges are naturally frame-friendly. You can align lines, use the bridge structure as a guiding element, and practice steady shooting. Since the stop is time-limited, it’s also a chance to refine your technique without taking on the pressure of a more crowded or more intricate building.
What you’ll likely enjoy here is the shift in perspective. Instead of one iconic facade, you’re collecting a layered view of multiple landmarks. That makes it a great stop for people who want their photos to feel like a story, not just a set of pretty postcards.
Stop 5: Matthias Church in just 5 minutes
Then comes Matthias Church, where the scheduled time is about 5 minutes. That’s not long, but it’s enough for the kind of shot analog cameras are good at: simple but striking compositions. The tour is designed so you can capture the astonishing Gothic beauty of the church, even with limited time.
If you want to make the most of a short stop, arrive with a plan. Decide what you’ll photograph before you reach the perfect viewpoint. On an analog camera, the “I’ll figure it out when I’m there” method can lead to rushed frames and missed moments.
Also, remember the pacing reality: if earlier stops took a little longer because you asked questions or tried extra shots, you’ll need to be extra efficient here. The guide’s job is to keep you moving through the day, so you’ll get the best experience if you stay tuned to the group’s timing.
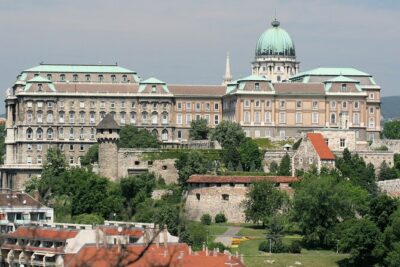
Stop 6: Fisherman’s Bastion and the Castle District finish
The final stretch reaches the Castle District area and ends at Fisherman’s Bastion. You’ll spend about 15 minutes here, looking around the Bastion inspired by early medieval architectural style.
This is a fitting finish because it gives you that “you made it to the top views” feeling. You’ve already worked your way across bridges and squares, so this stop is the payoff zone: open sightlines, photo-friendly angles, and a backdrop that feels different from the earlier downtown scenes.
It also helps that the tour ends right here. You’re not left walking back with your camera in your bag, tired and hungry. You can keep exploring nearby on your own if you want, or you can call it a successful photo session right at the finish point.
I also like the mental rhythm of the last stop: you’re not learning a new system or jumping around. You’re photographing and absorbing the atmosphere for a solid block of time.
Price and what you’re really paying for
The price is $142.97 per person, and it’s worth judging it as more than just a guided walk.
Here’s what makes it feel like value:
- You get guided instruction for analog photography, which isn’t usually included on city tours.
- You follow a planned route that hits major sights and timed viewpoints for photos.
- The group size is limited to 12 travelers, which helps the guide support you.
- Each stop lists admission ticket free, which reduces surprise costs tied to attractions.
You’re also paying for time and attention. A good analog experience isn’t just about pointing at buildings. It’s about helping you use the camera confidently and giving you a reason to stop at exactly the right angles. If you’ve ever tried analog photography in a new city without guidance, you know how easy it is to waste shots. This tour is designed to prevent that.
If you already shoot analog seriously and want maximum freedom, you might prefer renting a camera and roaming with a map. But if you want a guided framework and a memorable souvenir you can hold, this price starts to make sense.
Who this tour suits best
This experience is a strong fit for you if:
- You want a guided way to see Budapest’s major highlights without feeling rushed by a long museum day
- You’re curious about analog photography and want someone to walk you through basics
- You like viewpoints at bridges and scenic city angles
- You enjoy learning short, practical historical context while taking photos
It’s also a good pick for couples and friends. The pacing is designed to keep the group together while still giving you time to stop and look. And because the guide communication is described as smooth, you can expect the day to run in a calm, organized way.
If you’re hardwired for slow wandering, you may find the short stop times a little tight. On the other hand, if you love a structured plan and want your camera time to be the focus, this itinerary is built for you.
The pacing: walking loop, short photo windows, and time to ask questions
This is not a nonstop sprint. It’s a walking loop with photo windows that range from 5 minutes at Matthias Church to 15 minutes at several other key stops. That mix is deliberate. Big views get time to set up your shot, while striking details get enough time to capture one or two strong frames.
I like that the schedule gives you opportunities to talk and ask questions during stops. For analog, that matters because questions can be practical: how to frame, how to adjust for what you’re seeing, and what to do when you’re not sure you’re getting the shot.
Also, if you’re someone who moves slowly, the group size and guide style help. A smaller group tends to feel more flexible than a huge bus tour, and that makes a difference when you’re learning a new camera technique.
Weather and why it matters more than you think
This experience requires good weather. That’s not just boilerplate. With analog photography, conditions affect what you can comfortably see and shoot, especially at river bridges and open viewpoints.
If the tour gets canceled due to poor weather, you’re offered a different date or a full refund. So it’s worth keeping an eye on the forecast before you commit your evening plans.
If you show up with a “camera-first” mindset and dress for walking, you’ll get a smoother experience. That means comfortable shoes and a willingness to pause for photos even when the day feels busy.
Should you book the Analog Photo Trip?
I think you should book it if you want a fun, photo-focused Budapest evening that doesn’t require prior analog experience. The combination of a structured route, short guided explanations, and analog camera instruction makes it feel like more than sightseeing.
I’d skip it only if you strongly dislike walking, hate time limits at viewpoints, or need a long, slow tour format. This is a guided loop with a photo mission. For the right traveler, it delivers exactly that, and you end up with printed photos you can keep.
If you’re excited about bridges, Parliament-area architecture, and Castle District views—and you like the idea of making the city your classroom for analog—this is a genuinely solid way to spend your evening in Budapest.
FAQ
FAQ
How long is the Analog Photo Trip in Budapest?
It lasts about 3 hours 30 minutes.
Where does the tour start and end?
It starts at CBI CompareBudapest, Anker köz 2-4, 1061 Hungary and ends at Fisherman’s Bastion, 1014 Hungary.
What time does the tour begin?
The start time is 5:00 pm.
What language is the tour offered in?
The tour is offered in English.
How many people are in the group?
The tour has a maximum of 12 travelers.
Do I need separate admission tickets for the stops?
The stops list Admission Ticket Free for each location mentioned on the route.
Do I get instructions for using the analog camera?
Yes. You receive a brief instruction about the analog cameras and are guided during the trip.
Is mobile ticketing used?
Yes, the tour includes a mobile ticket.
What if the weather is bad?
The experience requires good weather. If it’s canceled due to poor weather, you’ll be offered a different date or a full refund.
Is free cancellation available?
Yes. You can cancel for a full refund up to 24 hours in advance of the experience start time.