REVIEW · PHOTOGRAPHY SESSIONS
Street photos through the most beautiful streets of Budapest
Book on GetYourGuide →Operated by Luigi Cantel · Bookable on GetYourGuide
Budget-priced photos, guided like a local walk. I like the way you move from Liberty Bridge to real, non-touristy streets instead of just repeating the usual photo stops. I also like that Luigi keeps things relaxed and helps you look natural, even if you usually hate posing. The only catch: this is photo-focused, so you’ll be walking and working on camera angles for the session, not doing a slow sightseeing day.
What you come away with matters most here. You get a 60-minute photography session, then a personal selection of finished images with corrections sent back within 24 hours (final count varies by group, comfort level, and how you feel in front of the camera). It’s a nice setup if you want images you can actually use right after your trip.
Luigi Cantel runs it in a private group setting, and he communicates in Italian and English. I appreciate that the vibe is calm and professional, because nothing kills a photo walk like awkward pressure or someone barking pose instructions every 20 seconds.
In This Review
- Key things that make this Budapest street photo walk worth your time
- Why Budapest’s bridges work so well for street photography
- Meeting at Fővám tér: the easy way to get started
- Liberty Bridge to the castle: turning icons into real portraits
- The non-touristy streets in between: where your photos stop looking like postcards
- Finishing at Elizabeth Bridge: closing your set with river light
- Photo delivery in 24 hours: what you get back (and how to use it)
- The Luigi factor: lighting, composition, and a no-pressure vibe
- Who should book this, and who should skip it
- Price and value: is $45 a good deal for 24-hour photos?
- How to get the best results (without turning it into homework)
- Should you book this Budapest street photo session?
- FAQ
- How long is the photography session?
- Where is the meeting point?
- Do we start at Liberty Bridge and end at Elizabeth Bridge?
- How many photos will I receive?
- When will I get the photos?
- Can I request photos at specific iconic places like Parliament or Fisherman Bastion?
- What languages does the instructor speak?
- Is it a private group?
Key things that make this Budapest street photo walk worth your time
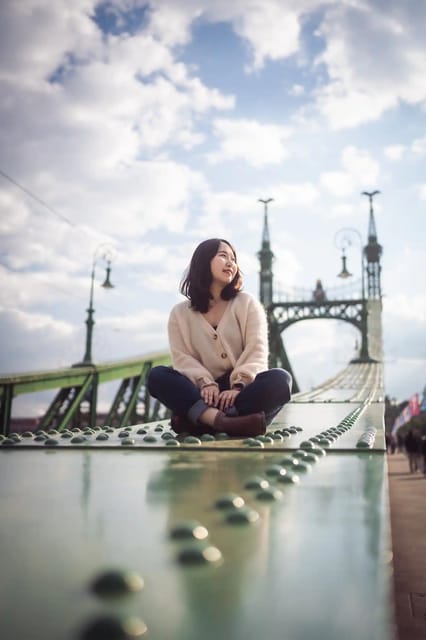
- Start at Liberty Bridge, finish at Elizabeth Bridge for a strong “from one side of the river to the other” story.
- Smart posing help so your photos look intentional, not stiff.
- Hidden, less-obvious street scenes between the big landmarks.
- Fast photo return with a personal selection and corrections in about 24 hours.
- Flexible route planning if you want Parliament or Fisherman Bastion instead of a straight line.
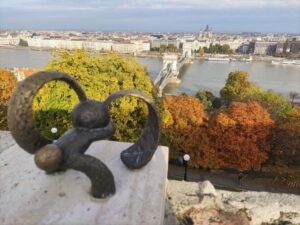
Why Budapest’s bridges work so well for street photography
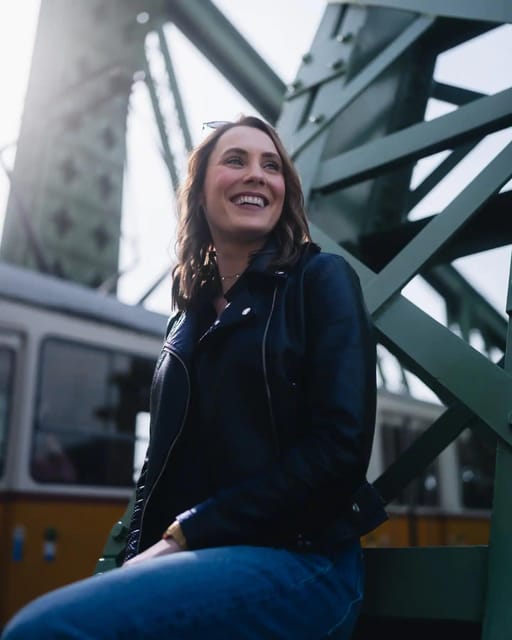
Budapest is a city of layers, and bridges are one of the easiest ways to show them. You get river views, graphic lines, and lots of angles that look good even when the light changes fast.
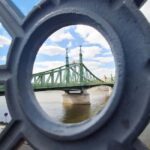
Starting at Liberty Bridge gives you a clean, iconic structure right away. Ending at Elizabeth Bridge closes the loop with another strong frame and a different feel along the Danube. That matters for your results: your set of photos ends up varied, not all “same landmark, different angle.”
If you’ve tried taking your own photos at bridges before, you already know the problem: you’re either missing the view or missing yourself. This kind of shoot solves that by combining location scouting with real-time direction, so you’re in the image without turning the whole thing into a selfie Olympics event.
You can also read our reviews of more photography tours in Budapest


Meeting at Fővám tér: the easy way to get started
You meet at Fővám tér 5, 1056, in front of Starbucks. The meeting point can vary depending on what option you booked, so double-check the exact instructions you receive before you go.
I like that the start is practical. You’re not hunting for a secret door in a side street while your camera battery dies. You also get to begin in an area where it’s simple to orient yourself before the shoot locks into its rhythm.
Because the group is private and the number of people is limited and variable, you don’t get stuck waiting forever for your turn. That keeps the energy moving, which is important for street photos where timing and lighting can change quickly.
Liberty Bridge to the castle: turning icons into real portraits
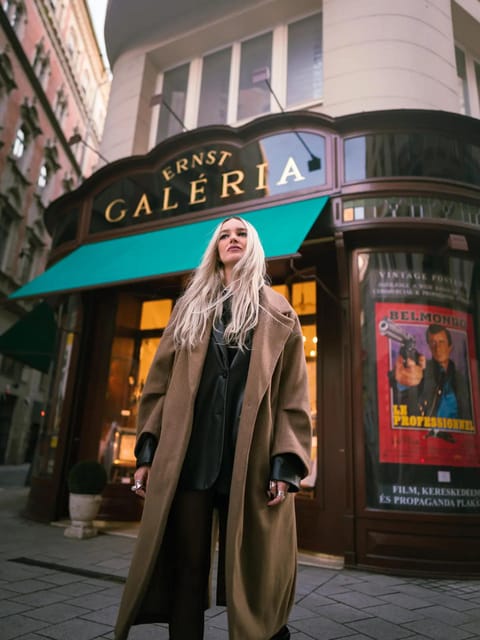
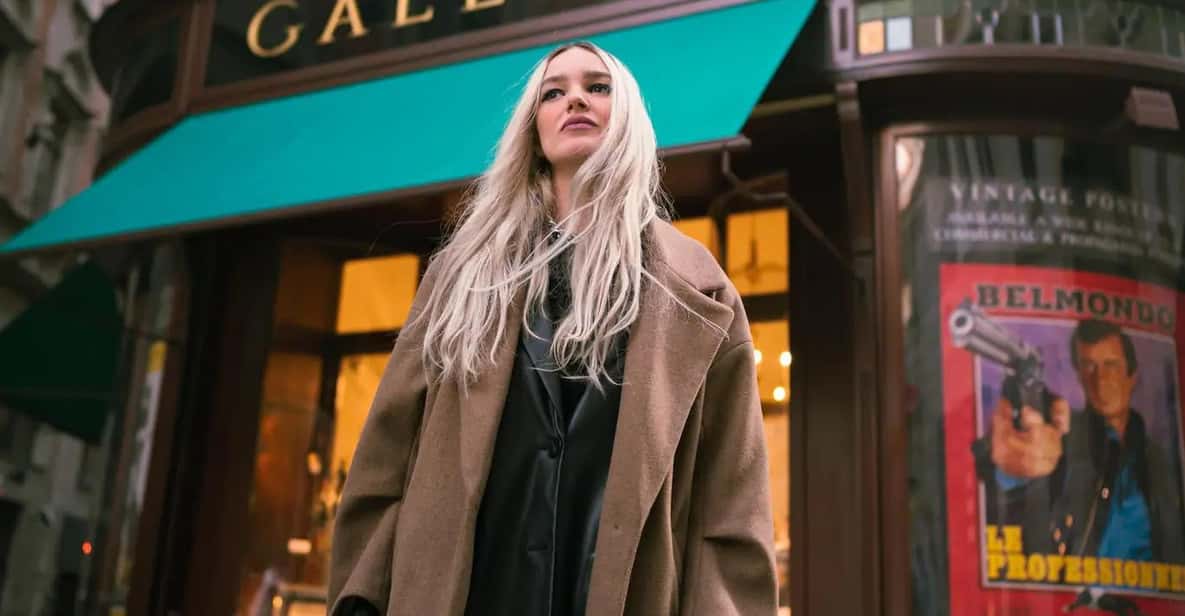
The walk is built around a simple idea: landmark first, then personality. You start at Liberty Bridge, and the goal is not just to photograph the bridge. It’s to use the bridge as the backdrop for you—posed, guided, and placed where the composition actually works.
From there you explore toward the Castle area. The Castle zone is ideal for portraits because it offers strong vertical shapes and textured walls that photograph well. You don’t need to know every corner by name to get good images here; you just need the right direction for where to stand and how to face the scene.
One detail I appreciate: you can ask to be photographed in favorite spots like Parliament or Fisherman Bastion. If those are must-dos for you, you’re not forced into a fixed script. The route can be adjusted so you get the specific locations you care about, while still keeping the street-photo feel.
Possible drawback to keep in mind: Castle and bridge areas can involve lots of stairs and uneven walking depending on the exact path. If your mobility is limited, you’ll want to communicate that early so the plan can be shaped around what you can comfortably handle.
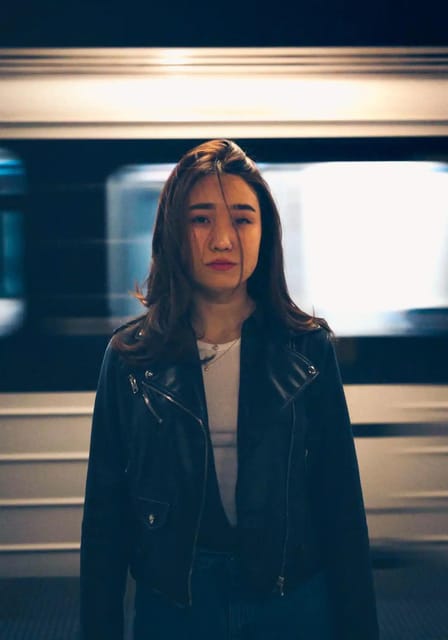
The non-touristy streets in between: where your photos stop looking like postcards
The most valuable part, in my view, is the stretch between the big names. That’s where Budapest starts to look like a lived-in city instead of a photo museum.
Here’s what you’re really getting when you explore quieter streets for a shoot: backgrounds that tell the truth. Small streets give you layered textures—doors, window light, street rhythm, and everyday details—that make your photos feel like you were actually there.
This is also where the photography direction pays off. On a quiet street, you can’t rely on a famous skyline to do all the work. Luigi’s job becomes placing you so the frame looks natural, not staged. That’s why people describe the vibe as easy and fun: the goal is comfort, not performance.
If you’re the type who worries about being in photos, this part matters even more. You’ll get guidance on posture and where to look, which helps you stop thinking and start looking like yourself in a way the camera can capture.
Finishing at Elizabeth Bridge: closing your set with river light
Ending at Elizabeth Bridge gives your photo set a clean finish. You’re not just collecting images; you’re building a sequence that starts with one major viewpoint and ends with another, with the “non-touristy” sections in the middle as the connective tissue.
Bridges also help because they show distance and depth. Your photos don’t just look like close-up people standing on the same street corner over and over. Even if the group moves at a walking pace, the visual story stays coherent.
I like that this kind of ending often feels less rushed than a “last landmark sprint.” You still get to work for the camera, but there’s a sense of wrapping up the shoot with a strong final backdrop.


Photo delivery in 24 hours: what you get back (and how to use it)
The shoot doesn’t end when you stop walking. You’ll receive your photos within 24 hours. Luigi makes a personal selection, then applies the necessary corrections.
The final count varies. The experience notes that the total number of final photos can fall between 20 and 100, and the included details also describe 50 to 100 photos depending on the person and how comfortable you feel in front of the camera. Either way, you’re getting a real set, not a tiny handful of blurry maybes.
If you’re planning to post soon, this timing is a big deal. Most people go home with photos they never fully edit. Here, the finished images arrive while you still remember the moments, which makes the whole thing feel more complete.
Practical tip: when you get the photos back, pick a few and share them quickly. The memories stay fresh, and you’ll also spot if anything needs a follow-up style adjustment next time you shoot in a new city.
The Luigi factor: lighting, composition, and a no-pressure vibe
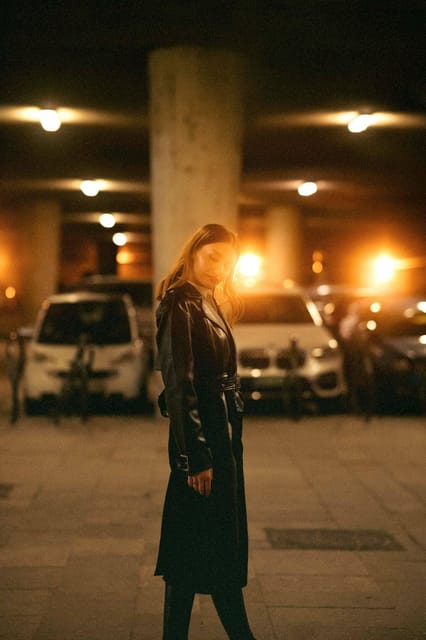
The strongest praise for Luigi is consistent: he makes the whole session feel natural and unforced. People describe the atmosphere as relaxed, fun, and patient, including for those who are introverted or not used to posing.
That’s not just nice to hear. It directly affects results. When you’re tense, your body language looks tense, and your photos reflect it. When you’re comfortable, the directions you’re given show up as smooth movement and confident posture.
You also get the benefit of an eye for lighting and composition. This matters in Budapest because the light can shift between buildings and along the river quickly. A good photographer doesn’t just pick locations; he picks the timing and the angles that make the scene look good in real life, not just in a mental Pinterest board.
I’d also add one important “work with the artist” note. If he’s directing your placement and posture, don’t over-control it. The best results usually come when you trust his vision and give the process a minute to do what it’s designed to do.
Who should book this, and who should skip it

This works especially well if you:
- Want street photography Budapest results without learning camera settings on vacation.
- Like real city scenes, not only monument checklists.
- Feel awkward in photos and want clear, calm help.
- Want finished images quickly, ideally while you’re still traveling.
You might want to consider a different option if you:
- Want a museum-heavy day or long indoor stops.
- Prefer wandering completely solo with zero direction.
- Are not comfortable walking and being guided through multiple photo setups.
The fact that you can request different iconic stops like Parliament or Fisherman Bastion helps, too. It means you can align the route with your personal priorities rather than accepting a one-size-fits-all loop.
Price and value: is $45 a good deal for 24-hour photos?

At $45 per person for a 1-day experience with a 60-minute photography session, the value comes from three things: speed, output, and guidance.
Speed: returning photos in about 24 hours is rare. It turns the photos into something you can actually enjoy during the trip, not just archive later.
Output: you’ll receive a personal selection with corrections, and the total final photos range broadly (20 to 100, with included details mentioning 50 to 100). That range depends on comfort and group size, but either way you’re not paying for a handful of images.
Guidance: street photos with your own camera often fall apart because you’re either behind the lens or missing good composition. This experience pays for someone to solve that problem on the spot—lighting, framing, and posing direction.
In plain terms: you’re paying to buy back time and confidence. If you want photos that look intentional instead of accidental, $45 can feel very reasonable.
How to get the best results (without turning it into homework)
You don’t need to bring complicated gear. The key is to show up ready to be directed and to move at a walking pace for multiple photo setups.
A few simple ways to help:
- Decide in advance which iconic shots you care about most (like Parliament or Fisherman Bastion), so you can request an alternative route early.
- Wear something comfortable to walk in. You’re doing a real city walk, not just standing still.
- If you feel shy, lean into it. A relaxed mood comes across in photos, and Luigi’s approach is designed to keep the session easy.
Also, remember that street photography is about small choices. Where you stand, how you hold your shoulders, and how you look at the scene matter. The directions you receive are the difference between a camera snapshot and a finished memory.
Should you book this Budapest street photo session?
I’d book it if you want Budapest photos that feel personal and well-composed, with help that makes the process calm instead of awkward. Starting at Liberty Bridge, working through the Castle area, and finishing at Elizabeth Bridge gives you a satisfying visual arc, while the quieter streets add real texture.
It’s also a strong fit if you’re short on time but still want standout results. With 24-hour delivery and a meaningful photo selection, you’ll leave with images you can use immediately.
If you hate the idea of being photographed or you want a totally self-guided day, then this may feel like too much structure. But if you’re curious and open to a little direction, you’re likely to enjoy the experience and love the final set.
FAQ
How long is the photography session?
The photography session is listed as 60 minutes, within an overall experience duration of 1 day.
Where is the meeting point?
The meeting point is Fővám tér 5, 1056, in front of Starbucks. It may vary depending on the option booked, so follow the exact meeting details you receive.
Do we start at Liberty Bridge and end at Elizabeth Bridge?
Yes. The plan starts from Liberty Bridge and ends at Elizabeth Bridge, with time spent exploring non-touristy streets in between.
How many photos will I receive?
The experience notes final photos between 20 and 100 photos. The included details also describe the final number as 50 to 100 photos including corrections, and the exact count varies by group size and how comfortable you feel in front of the camera.
When will I get the photos?
You receive all the photos within 24 hours. A personal selection is made with the necessary corrections.
Can I request photos at specific iconic places like Parliament or Fisherman Bastion?
Yes. If those are your priorities, an alternative route can be organized to include your preferred locations.
What languages does the instructor speak?
The instructor speaks Italian and English.
Is it a private group?
Yes. It’s a private group, with a limited and variable number of people.